You’ve likely admired the intricate beauty of fishtail braids but might’ve hesitated to try them yourself, thinking they require expert skill. This timeless hairstyle, known for its elegance and versatility, can elevate any outfit from casual to formal. With just a few essential tools and an understanding of the cross-over technique, you’ll find that creating this classic look is within your reach. But what happens when you want to add a modern twist or achieve a more relaxed, bohemian vibe? There’s more to explore when perfecting your fishtail braid style.
Key Takeaways
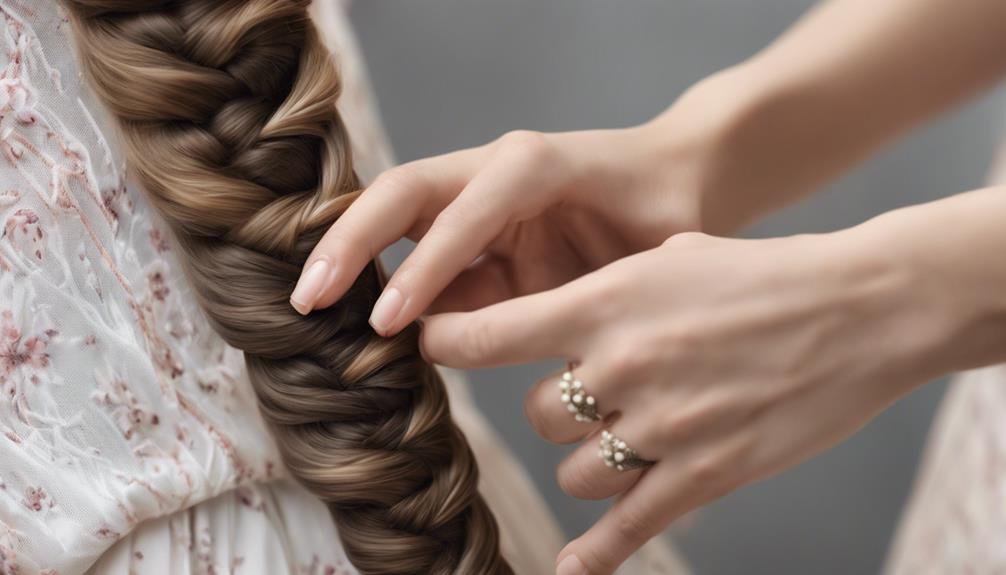
- Fishtail braids involve dividing hair into two sections and crossing small pieces over alternately.
- Consistent section sizing is crucial for a neat and balanced fishtail braid.
- Adding texture with dry shampoo or spray enhances the braid’s volume and grip.
- Gently pulling on braid edges can create a relaxed, fuller appearance.
- Secure the finished braid with an elastic band and use hairspray to hold it.
Essential Tools and Products
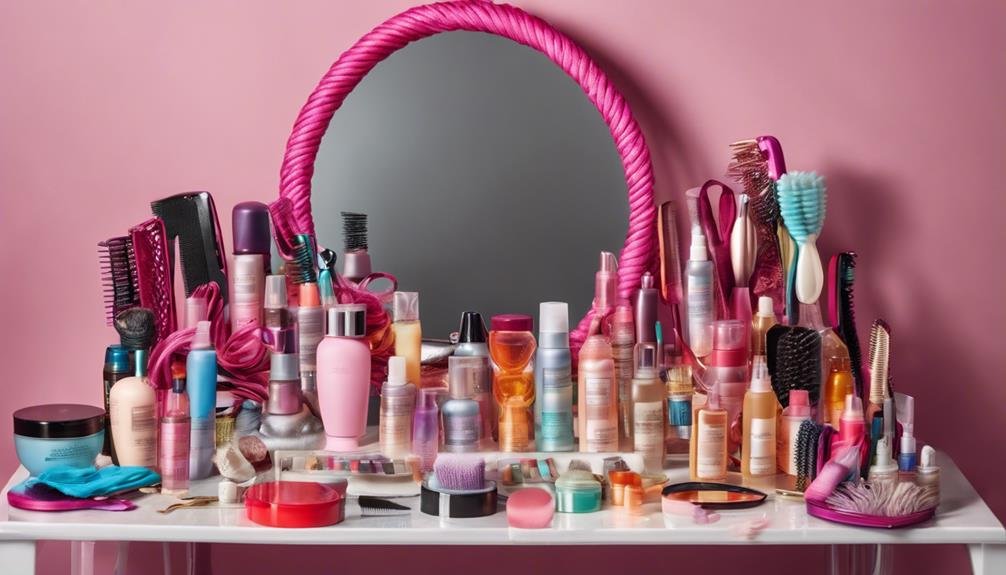
When you’re ready to create a stunning fishtail braid, having the right tools and products can make all the difference. Start by gathering a brush and comb to detangle and smooth your hair.
Once your hair is prepped, split it into a small section, forming the base of your fishtail braid. Hair elastics are essential to secure the braid at the end, while bobby pins help keep stray strands in place, ensuring a neat finish.
Duck bill clips are necessary for holding sections of hair out of the way as you braid. Consider using a dry shampoo or a DIY alternative to enhance the texture and grip. This added texture helps each small section of hair stay in place, making the fishtail braiding process more efficient.
Hairspray can lock in your style, while some styling paste defines the braid’s intricate pattern. Incorporate conditioning oil for added shine and smoothness.
These tools and products streamline your braiding process, allowing you to focus on creating beautiful, lasting fishtail braids. Consider checking Amazon for affiliate links to purchase any needed items.
Creating a Side Ponytail
Gather your hair materials and brush out any tangles to create a perfect side ponytail for your fishtail braid.
Secure your hair to one side at the base of your neck with an elastic band.
Then, divide the ponytail into two equal sections to prepare for the intricate braiding process.
Preparing Hair Materials
Although creating a fishtail braid might seem intricate, starting with a simple side ponytail lays a strong foundation. Begin by smoothing your hair into a side ponytail at the base of your neck. This step guarantees your hair is positioned correctly, making it easier to braid later. Before you proceed, brush through the ponytail to remove any tangles or knots. This preparation will ensure a neat and sleek appearance.
Once your hair is in a side ponytail, it’s time to divide it into even sections. This is essential for the fishtail braid to look balanced. Separate a small section from the outer edge of one side and get ready to incorporate it into the braid. The key is to keep the sections as uniform as possible, making the braiding process more manageable and resulting in a cleaner look.
To enhance the braiding process:
- Use smaller hair sections to maintain control and precision.
- Ensure sections are uniform in size for a consistent brand appearance.
- Smooth out any tangles before starting to keep the braid tight and tidy.
With these steps complete, you’re prepared to begin braiding.
Dividing Hair Sections
Creating a stunning fishtail braid starts with mastering the division of hair sections. Begin by gathering your hair into a side ponytail at the base of your neck. This position allows easy access and better control as you work on your braid. Make sure that your hair is smooth and free of tangles; this is essential for achieving the intricate and ornate appearance fishtail braids are known for.
Now, divide your ponytail into two equal sections. Hold one section in each hand. It might seem simple, but this is foundational for creating the braid.
The key to the fishtail braid’s unique look is using small sections of hair. As you start braiding, take a small piece of hair from the outer edge of one section and cross it to the opposite section. Continue alternating sides, incorporating small sections each time.
Smoothing and Securing
A sleek, safe-side ponytail sets the stage for a flawless fishtail braid. Begin by gathering your hair smoothly to one side of your neck. This initial step guarantees your braid will be neat. Use a brush to eliminate tangles, allowing you to work easily. The smoother your hair, the easier it is to divide it into sections for the braid.
- Brush the entire ponytail thoroughly to remove the knots.
- Gather all your hair at the base of your neck for a sleek appearance.
- Secure the ponytail with a hair elastic to keep it in place.
Once your ponytail is secured, divide it into two equal sections. These sections are the foundation of your fishtail braid. If you aim for an intricate design, use smaller hair sections to weave your braid. Section size and tension consistency are the keys to a mesmerizing fishtail. Secure the end of your braid with another hair elastic to guarantee it stays intact.
Starting the Fishtail Braid
Embarking on crafting a fishtail braid begins by dividing your hair into two equal sections. This foundational step guarantees your braid is balanced and long enough to make it look striking.
With the sections ready, you’ll start by taking a small piece of hair from the outer edge of one section. Then, cross it over to join the opposite section. Make sure you’re alternating sides as you progress, which creates the intricate weave that fishtail braids are known for.
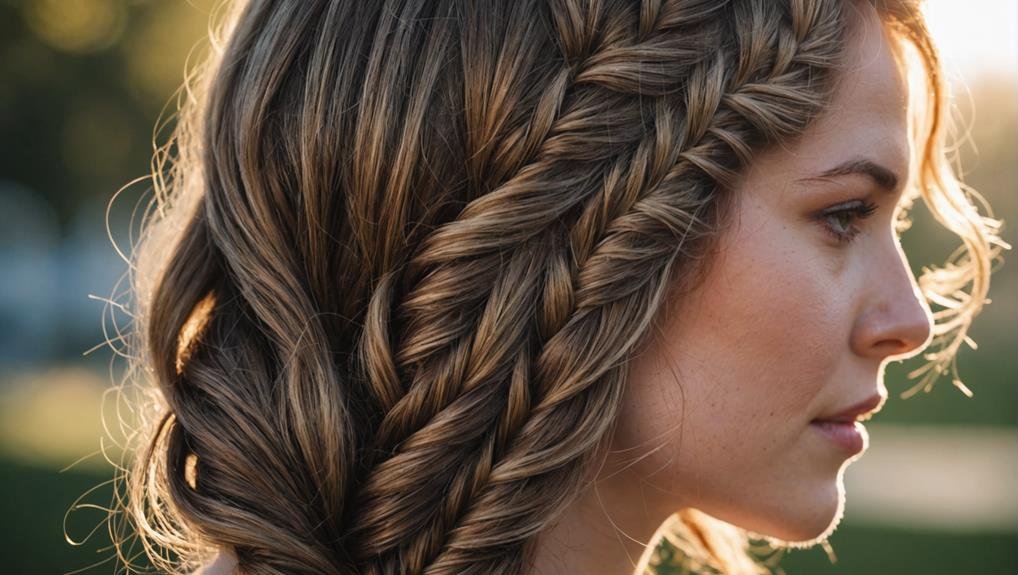
As you continue, keep your grip firm to maintain tension, which prevents the braid from loosening. Practicing this part closer to the crown of your head can give it a more polished appearance, making it suitable for casual and formal occasions.
Over time, you’ll become more adept at handling the sections, allowing you to explore variations like the French fishtail braid for different styles.
When you reach the end of your hair, secure the braid with an elastic band. This step guarantees your hard work stays intact throughout the day. With practice, starting a fishtail braid will become second nature.
Cross Over Technique
To master the fishtail braids’ cross-over technique, focus on consistently taking small sections of hair and crossing them over to the opposite side.
Keeping your sections uniform in size is essential for a tight and neat braid.
You’ll achieve the intricate look that defines a perfect fishtail braid with practice and patience.
Mastering Section Crossings
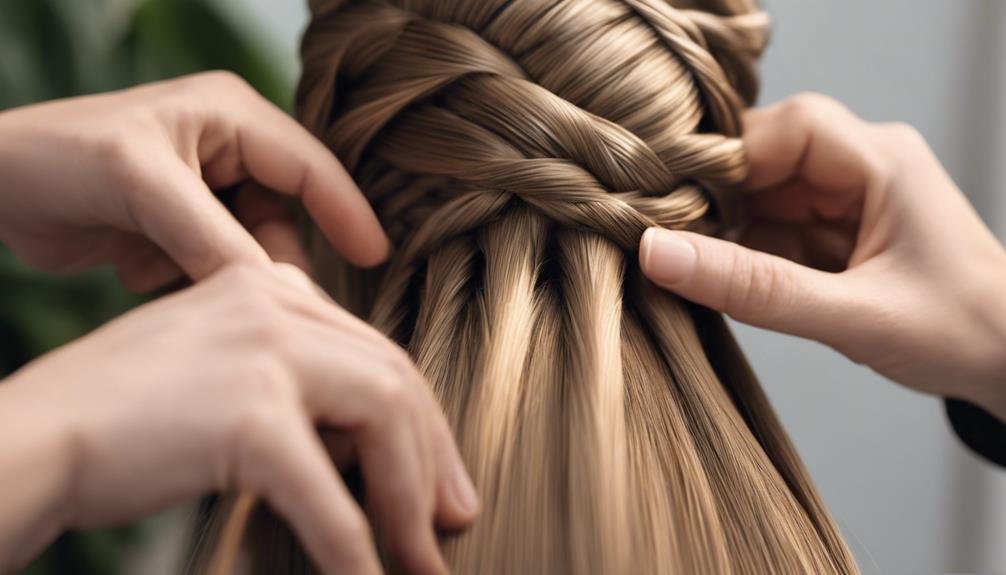
Beginning your journey into mastering section crossings, the key to a perfect fishtail braid lies in the cross-over technique. You’ll start by dividing your hair into two equal sections. From here, the magic begins. Take a small strand from the outer edge of one section and cross it over to join the opposite section. This simple yet meticulous move creates the intricate pattern that makes the fishtail braid so enchanting.
Here’s how to refine your technique:
- Focus on the outer edge: Always pick strands from the outer edge to maintain the fishtail’s distinct pattern.
- Keep strands small: Small strands lead to a tighter, more detailed braid.
- Alternate consistently: Cross strands from each side to weave a balanced braid.
You’ll find that practice is essential to perfecting your skills. The fishtail braid will appear more polished and professional as you become more comfortable with the cross-over technique. It’s all about rhythm and precision. Focusing on these small details will transform your braiding from basic to extraordinary. Patience and practice are your best allies in mastering section crossings for a stunning fishtail braid.
Consistent Section Sizes
Uniformity is your key weapon when perfecting the fishtail braid’s cross-over technique. To achieve that signature fishtail braid look, maintain consistent section sizes. The key lies in sectioning hair into pieces similar to a pencil’s diameter. Doing this ensures that each strand you cross over contributes to a balanced and cohesive pattern. When the section sizes vary too much, the intricacy of the fishtail braid diminishes, resulting in an uneven appearance.
Start by dividing your hair into two large sections. Then, take a small piece from the outer edge of one section and cross it over to the inside of the opposite section. Repeat this process, alternating sides. Consistent braiding with equal section sizes is essential here. It may take some practice, but patience will pay off as your fingers become more adept at gauging the right amount of hair to cross.
Consistent Section Sizing
Precision is key when it comes to creating a stunning fishtail braid. To achieve that flawless fishtail braid look, consistent section sizing is crucial. Each section should be similar in thickness, ideally around the diameter of a pencil. This approach guarantees neatness and maintains uniformity and balance throughout the braid. When you keep your sections consistent, the overall look of your braid remains polished and intricate, showcasing your braiding skills effectively.
Inconsistent section sizes can lead to a braid that appears uneven or messy. You want to avoid varying section sizes unless you intentionally choose a different style. Focusing on maintaining the same size for each section reduces the chances of your braid looking disorganized.
Here are some tips to help keep your sections consistent:
- Use a comb to divide your hair into even sections.
- Practice regularly to improve your technique and speed.
- Stay patient and focused, especially when starting.
Consistency doesn’t just come naturally; it takes practice and patience. However, with time, you’ll master the art of consistent section sizing, leading to more sophisticated and eye-catching fishtail braids.
Achieving a Messy Look
For a relaxed and trendy look, you can achieve a messy look with fishtail braids by gently pulling on the edges after securing them with an elastic band. This simple technique adds an effortless vibe, making your braids appear fuller and more stylish.
Begin by creating your fishtail braid as usual. Once it’s secured, gently pull at the sides of the braid. This loosening gives the braid a natural, lived-in appearance.
To enhance this messy look, consider removing a few face-framing sections from the braids. These loose strands soften the overall appearance and add an element of casual elegance.
Apply a texturizing spray or dry shampoo to your hair for more texture and volume before braiding. These products grip your hair and help create that coveted undone aesthetic associated with messy fishtail braids.
Embrace any imperfections or asymmetry in your braids. They contribute to the hairstyle’s effortless charm, perfect for casual outings or a laid-back day.
Two Fishtail Braids

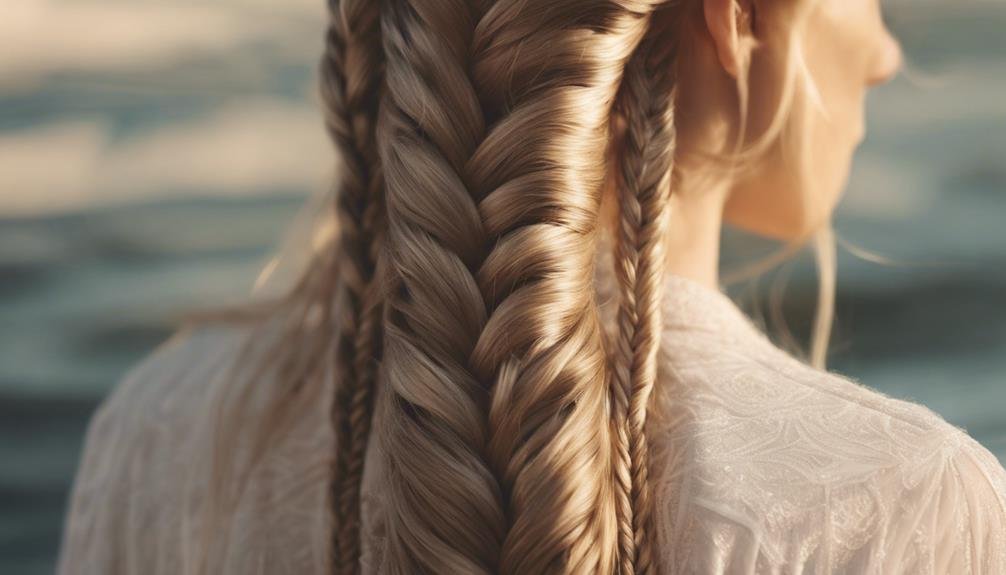
Creating two fishtail braids can add a touch of sophistication to your hairstyle. To achieve this elegant fishtail braid look, divide your hair into two equal sections down the center. This setup guarantees symmetry and makes the braiding process smoother.
Begin on one side and take a small section of hair from the outer edge of the section, crossing it over to the opposite side. Repeat this technique, alternating sides to form the intricate fishtail pattern. Secure them with elastic bands once you have braided them to the ends. This holds the braids in place and gives them a polished finish.
Enhance your style with these tips:
- Gently pull the edges of the braids to make them appear wider and fuller, adding volume without compromising the neatness.
- Pull out a few face-framing sections for a softer, more romantic look.
- Experiment with the tightness of the braid for different effects; tighter braids look sleek, while looser ones offer a relaxed vibe.
Setting and Securing
Setting and securing your fishtail braids is crucial when you want them to last all day. To achieve a stunning fishtail braid look, start by gently pulling the edges of the braid. This technique makes your braid wider, adding a fuller appearance without compromising its integrity.
Once you’ve reached the desired width, it’s time to set the style with hairspray. This step offers hold and control and guarantees your braids stay in place throughout the day, maintaining their loose and effortless feel.
Remember to add face-framing sections to elevate your style. Pulling out a few strands of hair around your face allows you to change the braid’s vibe, making it suitable for different age groups. These sections add a touch of softness, enhancing the overall appearance of the fishtail braids. Plus, they make the style more versatile and wearable for any occasion.
User Feedback and Tips
Knowing what others think about this stylish look is helpful when setting your fishtail braids for an all-day hold. Many users have expressed their enthusiasm and satisfaction with mastering the fishtail braid. They find the tutorial straightforward, thanks to clear instructions and visuals. Positive feedback often mentions how the model’s striking red hair color beautifully showcases the braid’s intricate design.
To enhance your braiding experience, consider these user-suggested tips:
- Video Tutorial Request: Many users have requested a video tutorial to aid visual learners. Watching the braiding process step-by-step can notably enhance understanding and execution.
- Email Address for Feedback: If you have suggestions or need further guidance, please share your thoughts. Providing an email address for communication can foster community interaction and continuous improvement.
- Experiment with Hair Colors: Inspired by compliments on the model’s red hair, try experimenting with different hair colors to see how they complement the fishtail braid style.
Conclusion
You’ve got all the tools and techniques to create stunning fishtail braids. Start with a side ponytail, and use the cross-over technique with consistent sections for a polished look. If you want a relaxed style, gently pull on the braid to achieve a messy vibe. Try two fishtail braids for extra flair. Finish by setting and securing your braid; remember, practice makes perfect. Embrace user tips and enjoy flaunting your chic, timeless hairstyle!
FAQs
What is a fishtail braid?
A fishtail braid is a hairstyle created by dividing the hair into two sections and weaving small strands alternately across. The result is a textured, intricate braid that looks like the tail of a fish. This versatile style works well for both casual days and formal events.
Key Differences: Fishtail braid: Two-section braid creating a fishbone-like pattern.
How do I make a fishtail braid?
To make a fishtail braid:
- Divide your hair into two even sections.
- Take a small piece from outside the left section and cross it to the right section.
- Repeat on the other side, alternating sections until you reach the end.
- Secure with a hair tie, then gently loosen the braid for a fuller look.
Key Tip: Loosen the braid slightly for a more relaxed, voluminous finish.
How long does a fishtail braid last?
If done tightly, a fishtail braid can last all day. Hair texture affects how long it stays intact—thicker hair holds braids longer, while finer hair may need hairspray or texturizing spray for extra hold.
Duration Tip: Use a light hairspray or texturizing spray for longer-lasting braids to maintain the style.