If you’re aiming to master the art of Pop Smoke braids, you’ll need to start by preparing your hair thoroughly. First, make sure your hair is impeccably clean and conditioned. This isn’t just about hygiene; it’s about creating a smooth foundation for each braid. As you part your hair into precise sections, consider how the size and placement of each part contribute to the overall look. This meticulous prep work is essential, but it’s just the beginning. What comes next in the braiding process defines the style and sets the stage for how well your braids hold up. Curious about the next steps? Let’s explore 10 Steps to Perfect Pop Smoke Braids.
Key Takeaways
- Start with clean, well-moisturized hair to ensure smooth braiding and prevent breakage.
- Part hair into precise sections using a rat tail comb for symmetrical braids.
- Apply Shine and Jam gel for sleekness and hold while braiding.
- Integrate extensions evenly for added length and volume in each braid.
- Secure the ends with styling strips and set with holding spray to maintain style.
Gather Your Tools and Products
Why not begin your Pop Smoke braids by gathering all the necessary tools and products? Start with a rat tail comb, perfect for parting your hair into sections for those neat box braids. You’ll also need shine and jam to make sure each brand is sleek, shiny, and holds well. This product is a game-changer as it provides both the necessary grip for braiding and a polished finish.
Next, grab some mousse and apply it to your hair before you start braiding. It adds texture and grip, smoothing the braiding process and helping you manage your hair better. Don’t forget the holding spray; it’s important to set your braids in place and ensure they last all day without frizzing up or unraveling.
Lastly, have some styling strips on hand. These will be essential for securing the ends of your braids, keeping them neat, and preventing them from loosening up. With these tools and products ready, you’re all set to create those stunning Pop Smoke braids that turn heads wherever you go.
Wash and Condition Hair
Start your Pop Smoke braids by washing your hair with a clarifying shampoo to eliminate any buildup and oils, ensuring a clean slate for braiding. This initial step is important as it preps your strands for the smooth execution of braids and reduces the chances of snags and discomfort during the braiding process.
After shampooing, following up with a deep conditioning treatment is vital. This step hydrates and strengthens your hair, making it more pliable and less prone to breaking when braiding. Deep conditioning ensures that your braids look neat but also healthy and vibrant.
Here is a quick guide to help you choose the right products for this process:
| Step | Product Type | Purpose |
|---|---|---|
| 1. Wash | Clarifying Shampoo | Remove buildup and oils |
| 2. Condition | Deep Conditioner | Hydrate and strengthen hair |
| 3. Prep | Hair Oil/Serum | Add shine and smoothness |
Ensure you thoroughly rinse all products to prevent any residue weighing your braids down. This foundational care routine sets the stage for stunning, resilient Pop Smoke braids.
Dry and Detangle Thoroughly

After washing and conditioning your hair, ensure it’s completely dry and gently detangle it using a wide-tooth comb. Starting with entirely dry hair is essential as it prevents frizz and guarantees that your Pop Smoke braids will look smooth and polished. A wide-tooth comb is vital to detangle thoroughly without causing breakage or discomfort.
When detangling, start at the ends of your hair and slowly work your way up to the roots. This technique helps minimize pulling and protects your hair from damage. Use a detangling spray or a light conditioner to facilitate the process. These products allow the comb to glide through your hair, making it easier to remove knots and tangles.
It’s important to take your time during this step. Rushing through detangling can lead to breakage and uneven hair texture, which could compromise the overall look of your braids. Ensuring that each strand is smooth and free of tangles contributes significantly to the final appearance of your hairstyle. Remember, patience here lays the groundwork for stunning Pop Smoke braids.
Part Hair Into Sections
To achieve perfect balance and symmetry, divide your hair into a middle part, aligning it with your ears. This initial step is important in creating the foundation for your Pop Smoke braids.
Next, pre-part your entire head to ensure that each section is evenly distributed. This helps achieve clean stitches and maintain the neatness required for each braid.
As you part hair into sections, consider these tips:
- Align Parts with Facial Features: Strategically place the eight braids to enhance your facial bone structure.
- Proportionate Sections: Make sure the size and proportions of the parts are consistent to avoid uneven braids.
- Clean Lines: Use a tail comb for sharp, clean lines for neat braiding.
- Even Distribution: Double-check that each section is similar in size to ensure the braids will be uniform.
Taking time to part hair into sections carefully sets the stage for the next steps and guarantees each braid looks precisely executed. Remember, the neatness of your parts directly influences the final appearance of your braids.
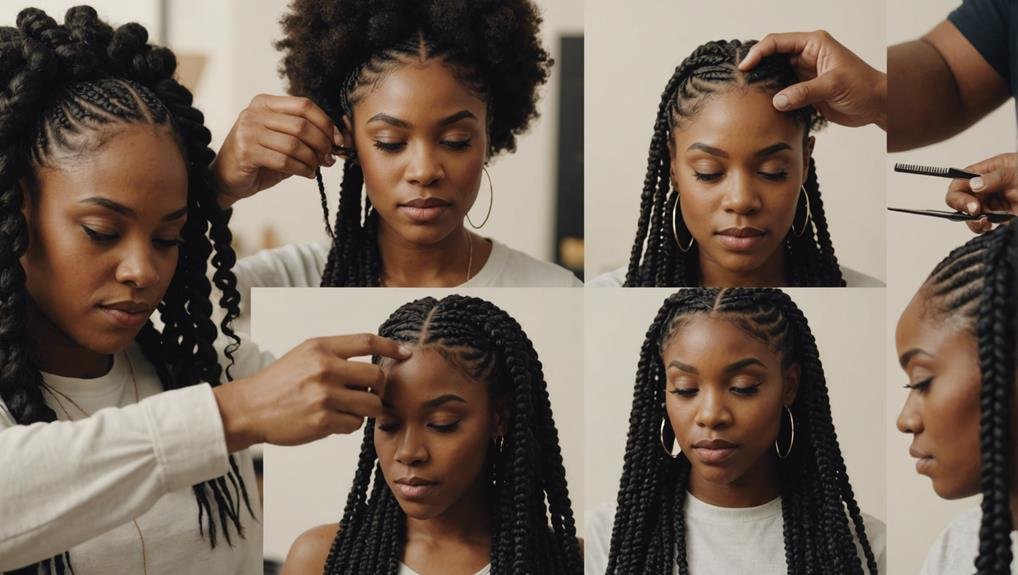
Start Braiding From the Back
Begin at the nape of your neck, braiding each section tightly and evenly to guarantee a clean and organized foundation. This initial step is important as it sets the stage for the entire braiding process, ensuring your Pop Smoke braids look impeccable from the bottom up.
As you work your way up, maintain even tension and a consistent braiding technique. This focus on uniformity helps avoid any uneven sections or loose strands that could detract from the neat appearance of your braids.
Secure each braid tightly as you progress, checking periodically to ensure no strays or bulges. It’s important to take your time and focus on precision, especially as you move from the lower sections to the upper ones. Remember, rushing through this process can lead to mistakes that might require starting over.
Return to my channel for more tips on perfecting your Pop Smoke braids as you approach the finishing touches. In the next video, I’ll guide you through maintaining even braid thickness throughout your style, ensuring your braids start strong and end flawlessly.
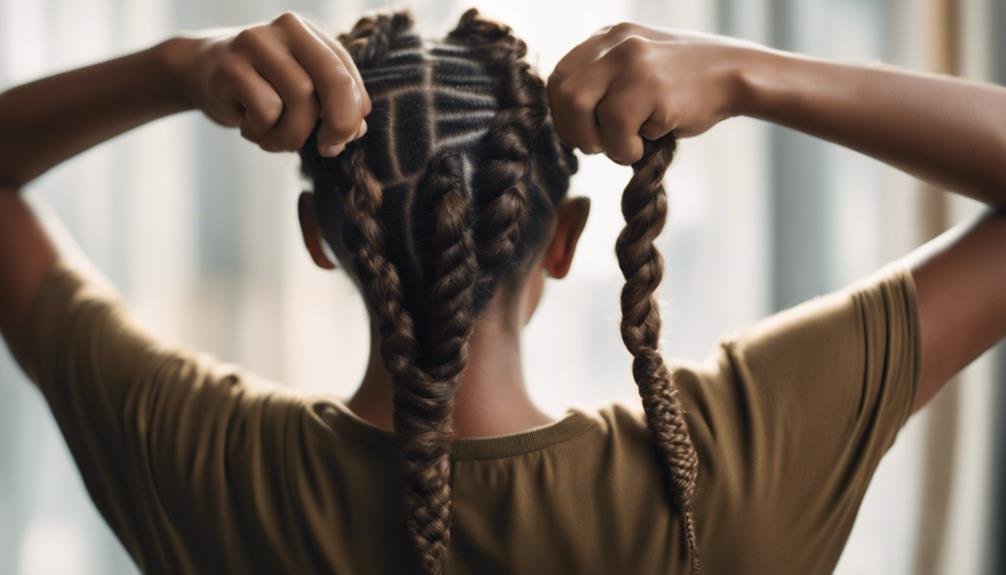
Maintain Even Braid Thickness
Ensuring each section of hair is equally thick is essential for maintaining consistency in your Pop Smoke braids. When you’re dividing your hair, a comb can help you achieve that precise, symmetrical look that is important for this style. Remember, each braid reflects your skill and the care you’ve taken in preparation.
Here are a few tips to keep your braids looking uniform:
- Use a tail comb to Neatly section off the hair. This tool allows for more precise divisions and helps avoid variations in thickness.
- Check the sections visually before you start braiding. Ensure that each section of hair looks similar in size to the others.
- Feel the thickness of each section with your fingers. This tactile check can help catch any inconsistencies you might miss visually.
- Adjust as needed during the braiding process. If a section feels thinner or thicker, redistribute the hair before proceeding.
Taking your time to ensure evenness in each braid will elevate the overall look of your Pop Smoke braids. Practice makes perfect, so be patient and attentive to the details for the best results.
Secure Braids at the Ends

Once you’ve finished braiding, wrap a small rubber band or hair tie around the ends to keep them secure and prevent unraveling. This is important for maintaining the integrity and appearance of your braids. Ensure you wrap the ends tightly enough to hold but not so tight that they cause discomfort or damage to your hair.
For a sleeker finish, consider applying a small amount of hair gel or edge control at the ends of the braids. This helps tuck in stray hair and gives your braids a polished look. Additionally, it’s vital to moisturize the ends regularly to keep them hydrated. Dry ends can lead to breakage, which might ruin the overall look of your Pop Smoke braids.
Here’s a quick guide to help you remember the steps:
| Step | Material | Purpose |
|---|---|---|
| Secure with band | Rubber band/hair tie | Prevents unraveling |
| Apply gel | Hair gel/edge control | Neatens and seal ends |
| Moisturize | Hair moisturizer | Prevents dryness and breakage |
| Night protection | Satin/silk scarf | Maintains shape and reduces frizz |
Following these steps will ensure the ends of your braids look great and last longer.
Add Extensions if Desired
If you’re aiming for longer, more voluminous braids, consider adding extensions to your Pop Smoke style. Extensions enhance length and boost overall volume, giving you that dramatic look Pop Smoke was known for. Whether you choose synthetic or human hair, both can effectively complement your natural hair, ensuring your braids are as authentic as possible.
When considering extensions, here are a few tips to keep in mind:
- Choose the Right Type: Decide between synthetic or human hair extensions. Synthetic hair is more cost-effective and comes in a variety of colors. Human hair, while pricier, tends to look more natural and lasts longer.
- Match Your Hair Color: Match the extensions with your natural hair color for a seamless look. If you’re feeling adventurous, mix in different shades for a highlighted effect.
- Integration Technique: Ensure the extensions are braided tightly with your natural hair. This ensures they don’t slip and look well integrated.
- Care and Maintenance: Handle your extensions with care regardless of the type. Proper maintenance guarantees they stay looking fresh and are reusable for future styles.
Adding extensions is a great way to experiment with your braids and enhance your overall style.
Apply Styling Products
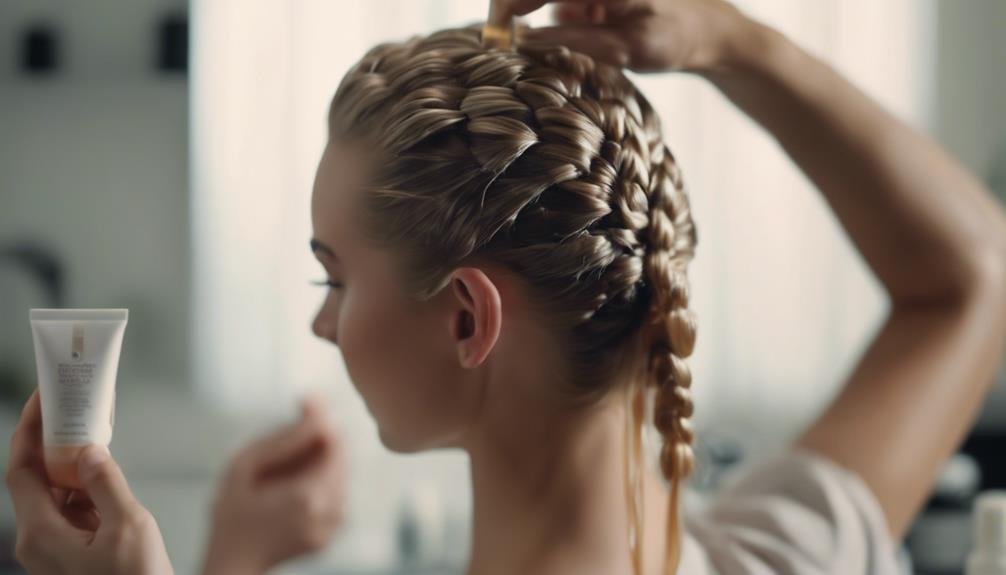
After adding extensions, apply Shine and Jam gel to each section of hair to enhance the braids with added shine and hold. This step, like setting the right tone in music, is vital for achieving that sleek, polished look. Shine and Jam isn’t just about thJamloss; it helps secure the hair, guaranteeing every strand stays in place as you braid.
Next, you’ll want to use mousse. Think of it as prepping your stage before a performance. Apply it evenly throughout your hair to smooth any frizz, laying a perfect foundation for the braids. This step is key for that neat, clean appearance that’ll make your Pop Smoke braids stand out.
Lastly, don’t forget the holding spray. Once your braids are done, a good spritz will lock them in place, similar to how a great track seals a musical album. It ensures your braids don’t just look good when you step out the door, but they stay fresh and intact, no matter where the day takes you. So, use shine and jam, mousse, and holdinJampray to keep your braids looking as sharp as your favorite beats.
What are the Best Products to Use for Perfect Pop Smoke Braids?
To achieve perfect Pop Smoke braids, it’s essential to use the top 10 products. These products include edge control, hair gel, hair wax, hair clips, hair ties, hair moisturizer, hair oil, hair spray, wide-tooth comb, and boar bristle brush.
Final Touches and Maintenance
Regularly moisturize your scalp and refresh the braids to guarantee your Pop Smoke braids maintain their sleek appearance. This regular maintenance is crucial to keeping your style looking fresh and vibrant.
Additionally, for those final touches that make all the difference, here’s what you need to do:
- Smooth and Shine: Apply mousse along the length of each braid to tame flyaways and enhance the overall shine. This step will ensure that your braids look meticulously polished.
- Set the Style: Once your braids are perfectly aligned and smooth, use a high-quality holding spray. This will keep your braids in place, prevent stray hairs throughout the day, and keep everything neat.
- Secure the Ends: Braid down to the very ends and secure them. This prevents your braids from unraveling and helps maintain each braid’s sharp, defined look.
- Wrap it Up: At night, wrap your braids with styling strips or a silk scarf. This reduces friction and helps maintain their shape and moisture, ensuring they look great for longer.
Conclusion
Now that you’ve followed the steps to achieve those sleek Pop Smoke braids, enjoy your fabulous new look!
Keep your braids fresh by regularly applying moisturizer and redoing loose ends. With proper care, your braids can maintain their vibrancy and style.
Don’t forget to wrap them up at night to protect them.
Flaunt your braids and let them reflect your unique style and confidence. Rock on with your stunning hairstyle!
FAQs
What are Pop Smoke braids?
Pop Smoke braids are a trendy style inspired by rapper Pop Smoke, featuring two rows of thick, defined cornrows on each side of the head. The style is typically achieved with four to six braids on each side, creating a bold, stylish, versatile, and protective look.
Key Points:
- Inspired by rapper Pop Smoke
- Thick, defined cornrows on each side of the head
- Stylish, protective, and bold look
10 Steps to Achieve Perfect Pop Smoke Braids
Step 1: Prepare Your Hair
Start with clean, detangled, and moisturized hair to ensure smooth braiding and prevent breakage.
Key Tip:
- Clean, detangled, and well-moisturized hair
Step 2: Section Hair into Two Halves
Using a comb, divide your hair into two even sections for symmetry.
Key Tip:
- Even part for balanced braiding on each side
Step 3: Divide Each Side into Rows
On each half, section the hair into two to three rows (based on your desired number of braids), keeping them evenly spaced.
Key Tip:
- Divide into rows for neat, organized braiding
Step 4: Start the First Braid
Begin with the first section closest to the middle part. Use a fine-tooth comb for smooth, clean lines.
Key Tip:
- Start with a small, even section at the part line
Step 5: Add Hair Extensions (Optional)
If you want added length or thickness, incorporate extensions into each section as you braid, securing them tightly.
Key Tip:
- Add extensions gradually for a seamless look
Step 6: Braid Tight and Secure
Use consistent tension as you braid each row to keep the braids tight and prevent frizz.
Key Tip:
- Keep tension consistent for a clean, polished look
Step 7: Repeat on Each Row
Continue braiding each row, adding extensions until all sections on one side are complete.
Key Tip:
- Repeat evenly for a balanced style
Step 8: Move to the Other Side
Once one half is complete, repeat steps 4-7 on the other side of your head.
Key Tip:
- Maintain symmetry for a professional look
Step 9: Seal the Ends
Seal the ends of each braid by dipping them in hot water (for synthetic hair) or using a small rubber band to prevent unraveling.
Key Tip:
- Hot water or rubber bands keep braids secure
Step 10: Set and Protect
Spray your braids with a lightweight setting spray or oil for shine, and wrap them in a silk scarf overnight to protect them.
Key Tip:
- Use a silk scarf and setting spray for longevity